Layout Page

Jeanie
Last Update il y a 5 ans

The Layout page is used to design your printed menu as well as to setup which products will show on MyMenu or MenuMobile (if enabled).
MenuMetric has a variety of printed menu styles available with multiple settings to adjust the layout and presentation to fit your needs.
A menu layout can be set manually or using templates. To build a menu manually, simply select which products you want in each column. Columns can be added or removed using the check boxes next to the package names. Each drop down in each column will contain the products that are setup in your account.

The easier way to layout your menu is to use a Template. Templates can be created in the Settings section of the menu. Click here to learn more about creating templates.
After you have created templates, they will show in the drop down at the top left of the screen. Simply select the template that you want to use and the layout will automatically be set for you.
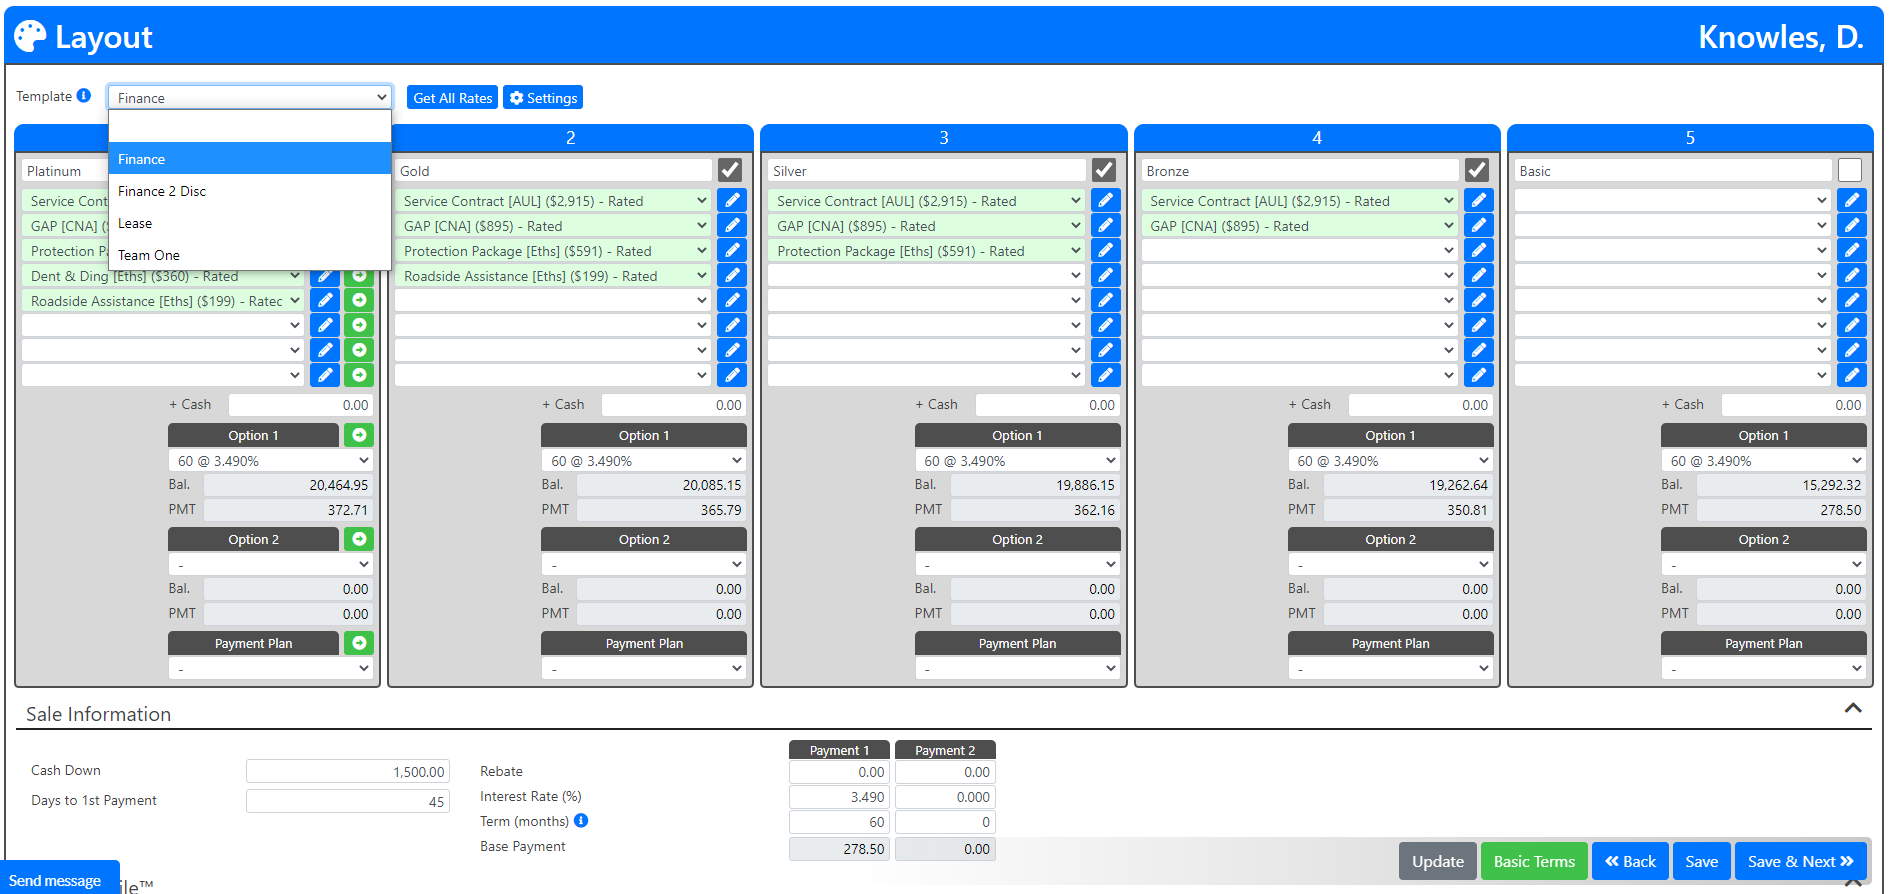
Additional changes to your menu style and presentation can be made using the Settings button at the top of the page. These settings can also be defaulted when you setup your templates.

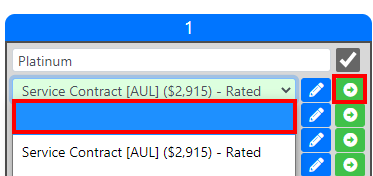
Products can be removed from your layout by selecting using the drop down for the product that you want removed and selecting the top (blank) option. Clicking the Green Arrow in the first column will push your change across to all columns.
MenuMetric allows two payments per column and a total of five rate and term combinations overall. At the bottom of each column there are drop downs for Option 1 and Option 2. These rates and terms can be set on the layout page or right below the columns as indicated below. *** Please note, if editing the terms on this page, you must click save at the bottom before the option will show in the drop down.
If the customer's cash down or the days to 1st payment have changed since you imported the deal, you may update those here as well. Again, you must click save at the bottom for the changes to take affect.

The final step prior to presenting your menu is to set your product coverages and prices. There are 4 ways to do this in MenuMetric.
1) Set product defaults
You are able to set static product defaults in the settings section of the system. Once set, these defaults will be be visible each time you start a new menu. Click here to learn more about setting product defaults.
2) Manually change product info on the fly
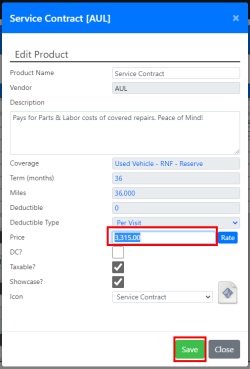
To edit product information within a specific deal, click the pencil next to the product name on the Layout page, edit the info as needed, and click Save.

3) Select a coverage and rate from available options returned during the rating process (if available for your vendor and product). Click here to learn how to Rate All products when importing. You can also rate each product individually by following the instructions below.
To select from available rates or to rate this product individually, click the Rate button after clicking the Pencil next to the product you want to edit.

Clicking Rate will open the rater page for that product. If you rated your products at import or using the Get All Rates button, you can filter your coverages on the left, click "DC" at the top right to view your Dealer Cost, and click the blue plus icon to select the coverage you want to show this customer on your menu. If you did not rate the product earlier, you can edit the options on the left and click Get Rates. This sends a request to your vendor for your rates for this product.

After selecting the appropriate coverage, the window will shrink and you'll have an opportunity to edit the retail price before saving the change to the menu.
4) Let MenuSelect choose your product options for you! Click here to learn more about MenuSelect.
If you did not rate all products at import you can do so on the Layout page by clicking "Get All Rates" at the top of the page. Click here to learn more about "Get All Rates"
If you prefer to use the MyMenu tablet presentation, click here to learn how it works!
When you have completed the layout and setup of your menu, click Save & Next at the bottom right to go to the Menu page.