Forms Page

Jeanie
Last Update 5 tahun yang lalu

The eForms page is where you will process all of your product contracts as well as print a waiver (accept/decline) form. MenuMetric features live contracting with nearly 200 product vendors. The contracting process communicates directly with your vendor's contracting system, allowing the vendor to create the contract on their side and send the completed PDF to MenuMetric.
This means that MenuMetric will never have contracts that are out of date, and because your vendor creates the contract it is immediately available in the vendor's portal for claims and remittance.
Creating contracts happens in three steps.
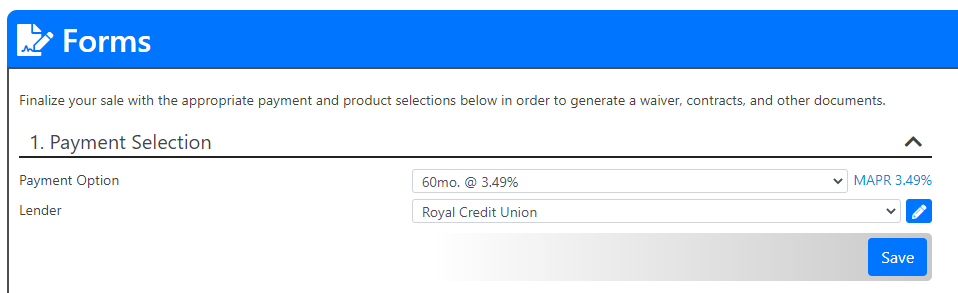
1) Payment Selection
Choose from the rate/term options that were presented to your customer and ensure the appropriate lender has been selected. If you imported your deal with the lender already entered in your DMS it will automatically show here. If you did not import with a lender or you are doing a manually entered deal, you can choose the lender from the drop down. (Don't see your lender in the list? Click here to learn how to add lenders to MenuMetric). Note: You can edit the lender info by clicking the pencil next to the lender name.
Click "Save" to move to Step 2.
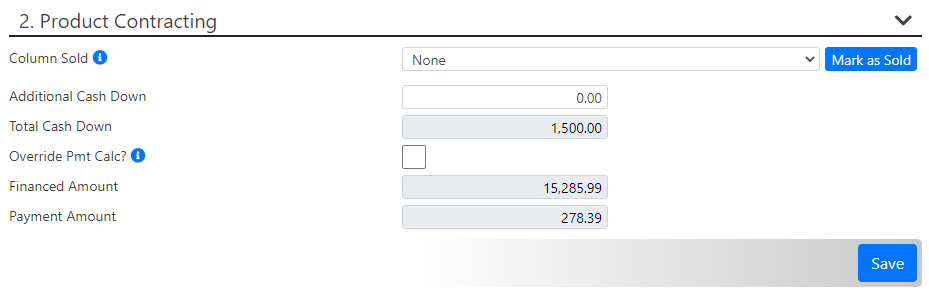
2) Product Contracting - pre-contracting adjustments
In step 2, prior to processing contracts, you can make a few adjustments.
- Use the drop down to select which column of products the customer purchased (if using a printed menu) and click "Mark as Sold". If the customer did not select one of the columns you can individually select each product as shown in the next section.
- Add additional cash down to your deal
- Click the "Override Pmt Calc?" check box to edit the Financed Amount and Payment Amount. These numbers will print on your contracts, so be sure to double check prior to generating contracts. If you have already generated your contract and need to make an adjustment, simply Void your contracts, make the adjustment, and then regenerate.
Click "Save" prior to moving on to processing contract.
3) Product Contracting - Generate Contracts
If you selected a column to mark as sold, or if the customer used MyMenu or MenuMobile to make their product choices, you will see the appropriate products marked sold in this section.
Click the "Sold" check box for each product to add or remove as needed.

There are two ways to generate your product contracts.
1) Generate All - If you are confident that all of the information and your product selections are correct, simply click "Generate All". This will send the contract request to your vendors, their system will make the contracts and send the PDF forms back to MenuMetric.
*** All products must have a Green circle with a check mark in order for Generate All to work properly. See below for a list of all statuses.

2) Generate each contract individually - If you are missing information, get a contracting error, or need to update the product you are selling, simply click the Contract button next to the product that needs to be updated and the Contracting page will open on the right.
Customer information can be edited in the "Sale Information" section on this page.
To edit the selected product coverage, term, or deductible, click the "Rate" button. Click here to learn more about Rating from this page.
Once all information has been updated as needed, click "Generate" to process this contract.

Once a contract has been generated you will see the Status for that product update to show a PDF icon.

If there are errors when processing a contract a Red circle with an exclamation point will be displayed. You can view the error message by hovering over the icon or by clicking "Contract", which will display the error at the top of the right hand side of the page as shown below.
Most errors will clearly explain the issue. In the scenario below, the Finance Manager selected a 60 month GAP term for a 72 month loan. To fix the error they would click the "Rate" button and select a 72 month GAP term and then click "Generate" again to process the contract.
If you are not able to understand the error message please contact MenuMetric support.

Status Icons
- MenuMobile - Indicates that the customer selected this product when using MenuMobile
- Not Rated - The product was not rated. Rating can be completed from the Layout Page or by marking it sold and clicking the "Contract" button for that product and then "Rate".
- Sold Unrated - Same as Not Rated, but the product has been marked as sold.
- Rates Returned - This indicates that the rating process has been completed, but no options have been selected. Click "Contract" and then "Rate" to select a coverage.
- Rate Selected - This contract is ready to be completed.
- Rating Error - The product vendor has returned an error. See above for instructions.
- Contracted - The contracting process is complete and a contract PDF is available to view, print, and sign.
- Signed Contract - The PDF has been electronically signed. Click here to learn more about esignatures.

After a contract has been generated, you can view the PDF by clicking "Contract" and then clicking the "Display" button on the right.

If you generated more than one contract and would like to display all of the contracts at once, click "Display All" below the product list. This will combine all of the product PDFs into a single file that can be downloaded or printed.
You may also Void All of the contracts at once using the button shown below.

Finally, step 3 will show additional forms that are available to be printed. Simply click select for the form that you would like to view, complete any additional information as needed and then display the form.


Click "Save and Next" to continue to the Logging Page.